Craft Kits
A small sampling of the kinds of crafts Spring-Mar kids will get to create as part of Learn Through Play curriculum.
Parts of a Plant Craft
Instructions Download:
Skills Built:
In this activity children will create a flower. They’ll bring their creative vision to life and build
fine motor skills through coloring, spraying, gluing, and cutting. After they make their flower
they will learn about the parts of a plant and their functions.r.
Materials: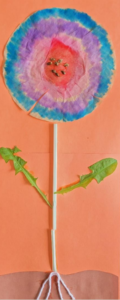

• 2 pieces of construction paper (any color, for background)
• Coffee filter (Alternatives: cupcake liner or circle cut from paper)
• A straw (Alternatives: green paper, paint, marker, or crayon) for the stem
• Brown paper or paint
• A few seeds (These can be saved from an apple or other food.)
• Real leaves (Alternatives: green paper, paint, marker, or crayon)
• Yarn or string, about 12”
• Scissors
• Glue or gluestick
• Tape
• Markers and a spray bottle or watercolor paints
• Paper towels
• Optional: paint brush
Instructions:
- Color the coffee filter with markers. Place on paper towels then spray with water
to blend colors. Let dry. - Fringe the edges of the coffee filter with scissors to
create petals. - Tape 2 sheets of paper together to make a long
background. - Glue the coffee filter flower onto the background
paper. - Using brown construction paper or paint, make a
few inches of soil at the bottom of the paper. - Make a stem for the flower using paint, marker,
green construction paper, or a straw. The stem
should stretch from the flower to where the dirt
starts. - Place a few leaves on the stem. You can collect real leaves from outside or make
them from paper, paint, or marker. - Cut a few short lengths of yarn for roots. Glue these to the bottom of the stem.
Show your child that if this were a real plant, the roots would be underground and
everything else would be above ground. - Glue the seeds in the center of the flower.
Now that you’ve made a flower, it’s time to identify the parts and learn what they
do. If you’d like, you can label the parts on your craft project.
Flower: The flower’s job is to help make new plants. It attracts insects (and other
pollinators) that move pollen from one flower to another. That pollen sharing helps the
flower make seeds. To keep the seeds safe and help them spread (so they grow in
many different places), part of the flower develops into fruit.
Stem: The stem holds up the plant and moves water, food, and nutrients around the
plant. It’s like a highway that the water, nutrients, and food can travel on.
Leaves: The leaves make food for the plant.
Roots: Water and nutrients that the plant needs are in the soil. The roots move the
water and nutrients into the plant. They also help hold the plant in place in the ground.
Learning Extensions:
- Leaves make food for the plant through photosynthesis. Learn more about
what photosynthesis is. - Go for a nature walk. Can you identify these parts on other plants? Look for
bees or other pollinators on flowers and watch them fly from flower to
flower, leaving behind pollen that the flower will use to make seeds.